College Ready Blog
A complete college-ready walkthrough of my final project — a 3-level laser boss-fight game built with the GameEngine framework. Covers OOP inheritance, data types, control structures, operators, I/O, debugging, and API integration.
📋 Table of Contents
- Game Overview
- OOP — Classes, Inheritance & Constructor Chaining
- Methods & Parameters
- Data Types
- Operators
- Control Structures — Iteration, Conditions, Nested Conditions
- Input / Output — Keyboard, Canvas, GameEnv
- API Integration — Leaderboard & Async I/O
- JSDoc Comments & Code Documentation
- Debugging — Console, Hitbox, Sources, Network, Application, Element
- Testing & Verification
- Other Game Examples & Rubric Connections
🎮 Game Overview
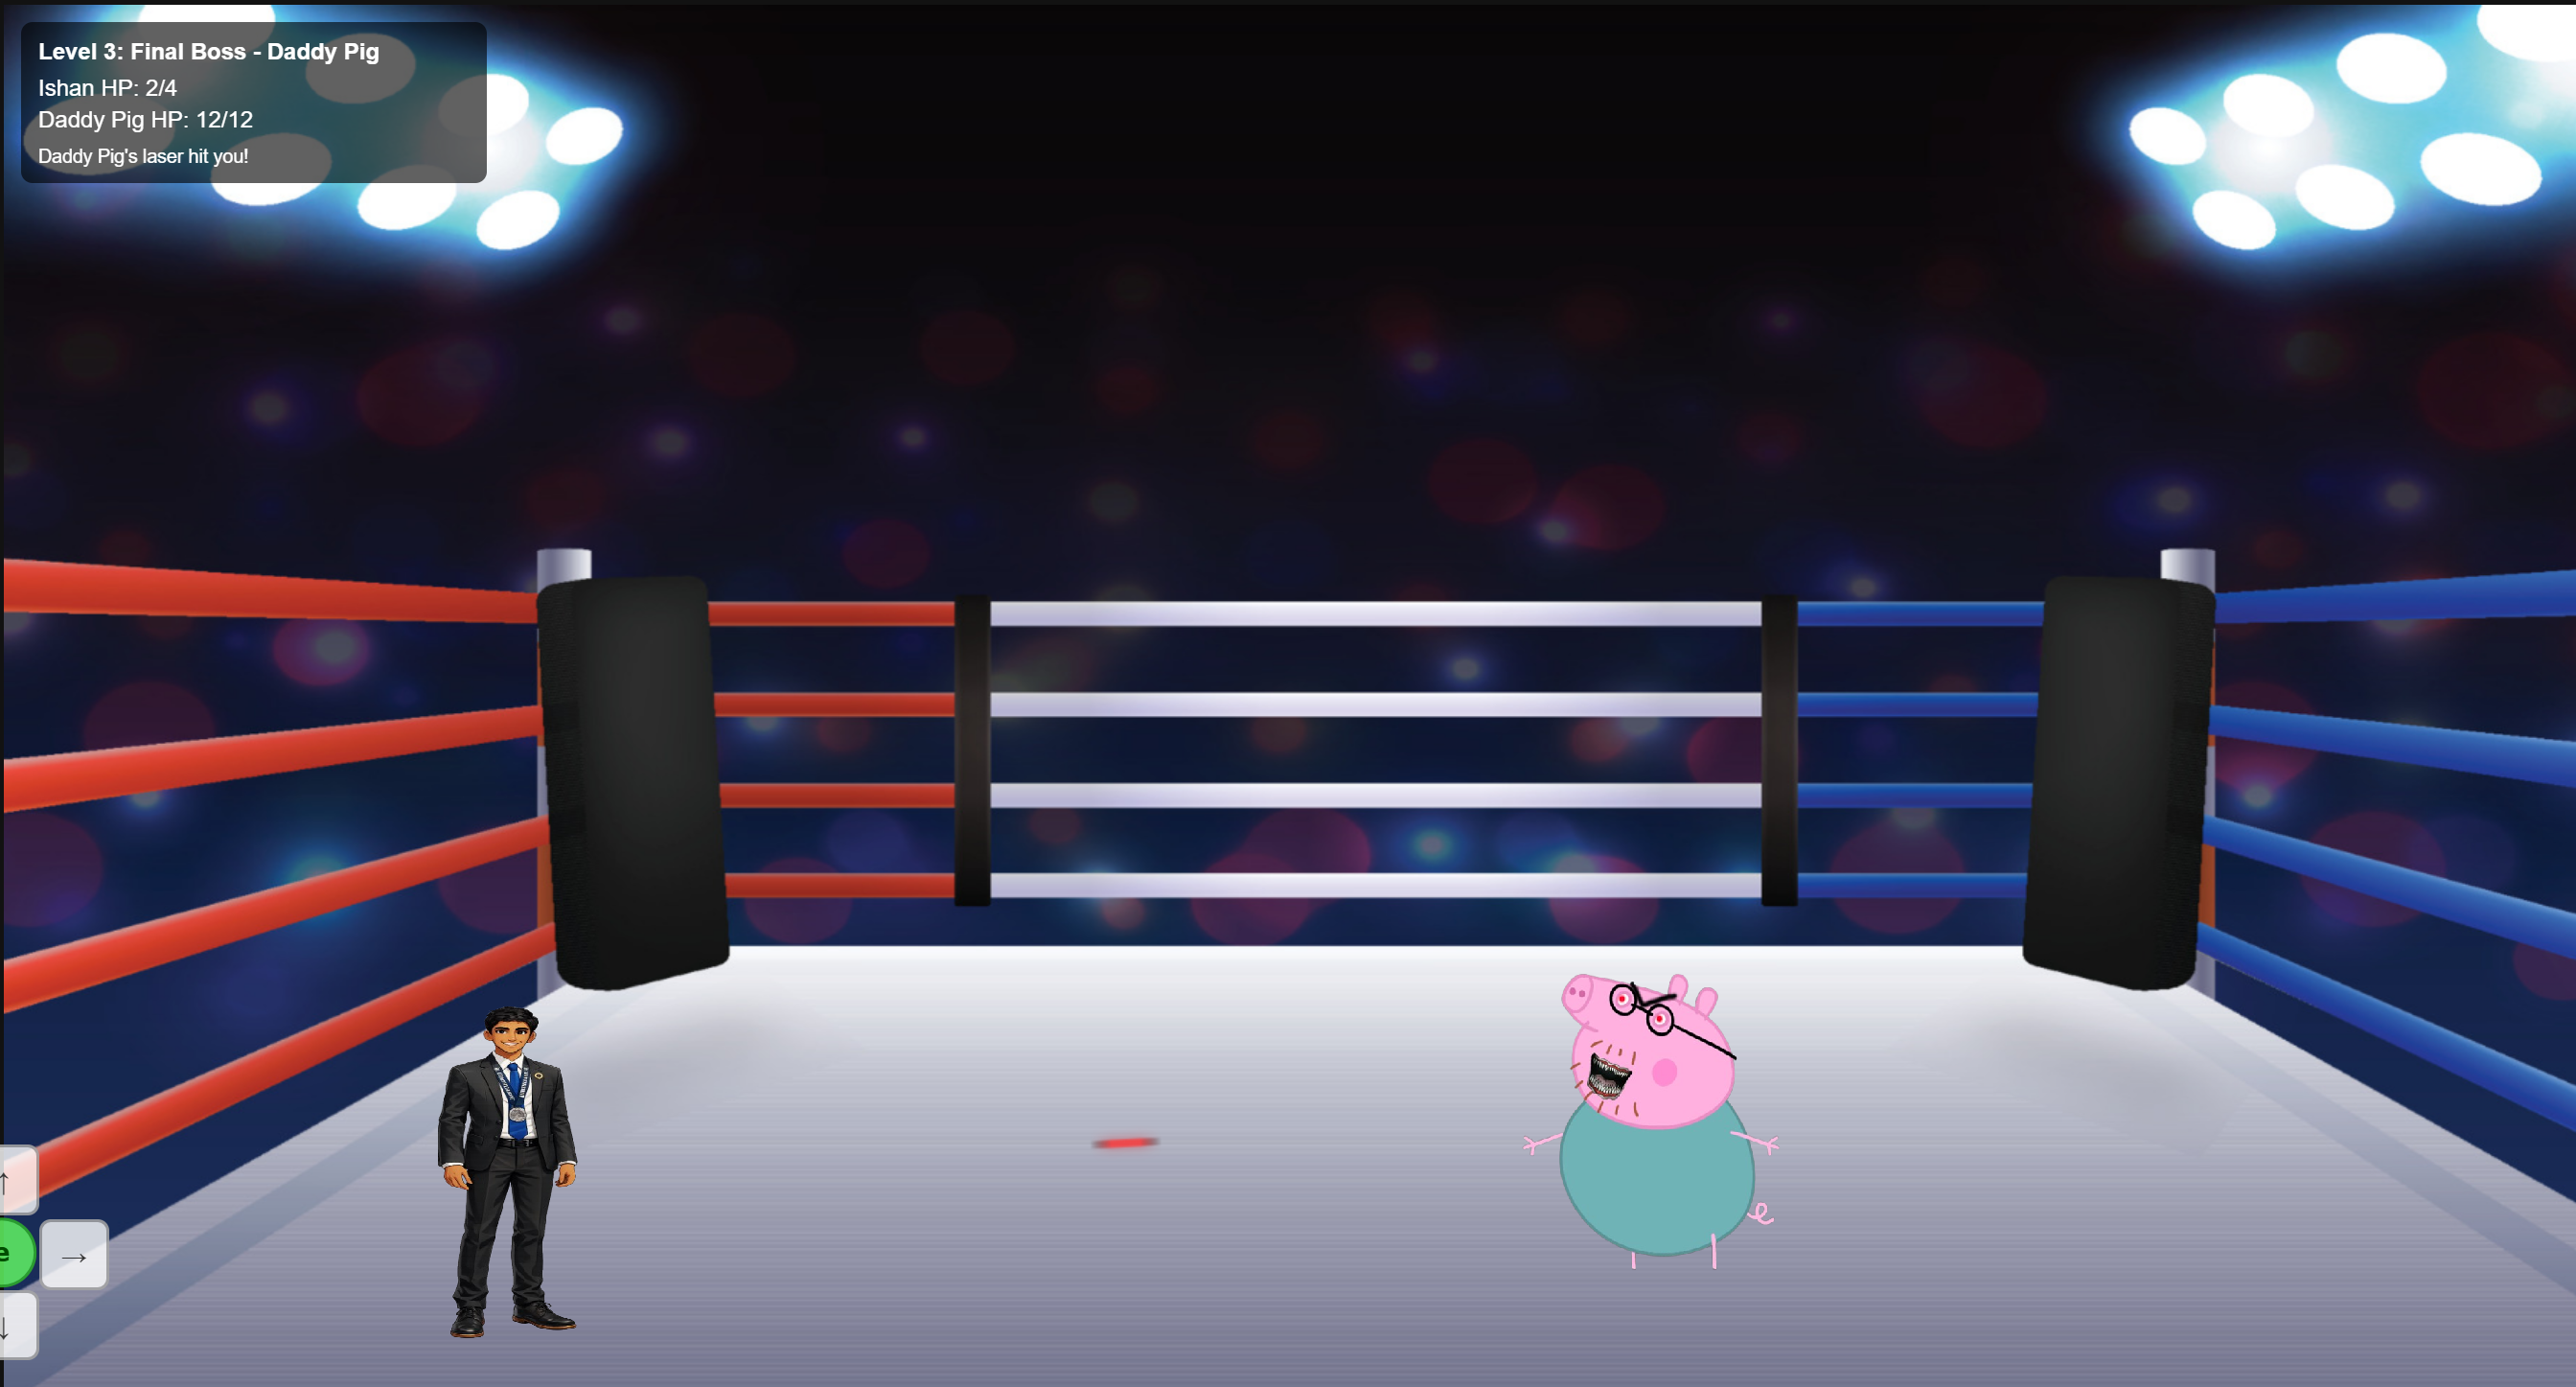
Peppa Pig Fight Club is a 3-level boss-fight game where the player (Ishan Jha) battles through the Peppa Pig cast using WASD movement and SPACE to fire lasers. Every mechanic you experience as a player — the boss chasing you, your laser hitting and dealing damage, the health bar dropping, the level ending when the boss dies — is directly controlled by the code explained in this blog.
| Level | Enemy | Enemy HP | Speed | Key New Concept |
|---|---|---|---|---|
| Level 1 | George Pig | 5 | 1.0 | Inheritance, config objects, laser spawning |
| Level 2 | Peppa Pig | 5 | 1.2 | Boolean state flags, data-driven design |
| Level 3 (Final Boss) | Daddy Pig | 12 | 1.4 | Nested conditions, invulnerability cooldown |
📐 OOP — Classes, Inheritance & Constructor Chaining
Class Hierarchy (2+ levels deep)
The game is organized into two inheritance chains. The first controls the boss enemy — what it looks like, how it moves, and how it takes damage. The second controls each level — what objects appear, what the background is, and what rules the battle follows. Without this hierarchy, every level would need its own copy of all the laser, HUD, and collision code.
PeppaBattleLevelBase ← MY BASE CLASS: laser system, HUD, collisions ├── PeppaLevel1 ← George Pig config ├── PeppaLevel2 ← Peppa Pig config └── PeppaLevel3 ← Daddy Pig (final boss) config
Writing Custom Classes
PeppaBossEnemy is the class that controls everything about the boss character during a fight — how much health it has, whether it's currently alive, how fast it chases the player, and whether it can be hit right now. Without this class existing as a separate object, there would be no boss to fight. The constructor runs once when the level starts and sets up all the starting values that control boss behavior for the entire fight.
/**
 * PeppaBossEnemy — custom boss class extending the Enemy base.
 * Adds health system, defeat state, invulnerability window, and hitbox debug.
 * @class PeppaBossEnemy
 * @extends Enemy
 */
class PeppaBossEnemy extends Enemy {

  /**
   * @param {Object} data     - Sprite and config data for this enemy
   * @param {Object} gameEnv  - Shared game environment (canvas, objects, path)
   */
  constructor(data = null, gameEnv = null) {
    super(data, gameEnv);        // constructor chaining → Enemy → GameObject

    this.health         = data?.health    ?? 3;   // Number
    this.maxHealth      = this.health;
    this.moveSpeed      = data?.moveSpeed ?? 0.8; // Number
    this.isDefeated     = false;                  // Boolean
    this.isVulnerable   = true;                   // Boolean
    this.showHitbox     = false;                  // Boolean
    this.lastDamagedAt  = 0;                      // Number (timestamp)
    this.invulnerabilityMs = 300;               // Number (cooldown window)

    console.log(`[PeppaBossEnemy] Spawned: ${data?.id} with ${this.health} HP`);
  }
}Enemy constructor, which sets up the canvas element and loads the boss sprite image from the src path. Without that super() call, the boss would have no image, no canvas to draw on, and no position in the game world — it simply wouldn't exist visually. Everything my custom code adds (health, speed, defeat state) layers on top of what super() builds.
Code Runner Challenge
Create a class with constructor and method, then run it. This is a small practice for OOP and constructor chaining in your game classes.
Method Overriding
The engine calls update() on every game object 60 times per second. By overriding it in PeppaBossEnemy, I control exactly what the boss does each frame — whether it chases the player, whether it draws its hitbox, and whether it stops doing anything after being defeated. Without this override, the boss would use the default Enemy behavior, which doesn't know about health or defeat state. I also override handleCollisionEvent() to intentionally do nothing — collision damage is handled by the level, not the boss itself.
// OVERRIDES Enemy.update() — custom chase + hitbox draw behavior
update() {
  this.draw();                       // inherited from GameObject

  if (this.isDefeated) return;        // early exit if dead

  const player = this.findPlayer();
  if (!player) return;

  const moved = this.moveTowardPlayer(player);
  if (moved) this.stayWithinCanvas();   // inherited method

  if (this.showHitbox) this.drawHitbox();
}

// OVERRIDES Enemy.handleCollisionEvent() — delegated to level logic
handleCollisionEvent() {
  // Collision managed by PeppaBattleLevelBase, not the enemy itself
}update() runs every single frame, the override is what makes the boss feel alive. Each frame it re-draws the sprite, checks if it's dead (and stops moving if so), finds where the player is, and takes one step toward them. Remove this override and the boss freezes in place. The handleCollisionEvent() override is intentionally empty — if the engine's default collision fired, it could interfere with my own damage system in PeppaBattleLevelBase, so I block it here.
Instantiation — GameLevel Configuration with Object Literals
The this.classes array is what tells the engine which objects to actually create and put into the game world when a level starts. The engine reads this array, creates a new instance of each class using the paired data object, and adds it to the game loop. If PeppaBossEnemy isn't in this array, there's no boss — the player would be fighting an empty room.
// Inside PeppaBattleLevelBase constructor — instantiates all game objects
this.classes = [
  { class: GamEnvBackground, data: image_data_background },  // Object literal
  { class: Player,           data: sprite_data_ishan    },  // Object literal
  { class: PeppaBossEnemy,   data: sprite_data_enemy    }   // Object literal
];

// sprite_data_enemy is a JSON config object — all required properties
const sprite_data_enemy = {
  id:             config.enemyName,
  greeting:       config.enemyGreeting,       // String
  src:            `${path}/images/gamify/${config.enemyImage}`,
  SCALE_FACTOR:   config.enemyScale ?? 4,    // Number
  ANIMATION_RATE: 18,                         // Number
  INIT_POSITION:  { x: width * 0.72, y: height * 0.66 },  // Object
  health:         config.enemyHealth,          // Number
  moveSpeed:      config.enemySpeed,           // Number
  hitbox:         { widthPercentage: 0.45, heightPercentage: 0.6 }
};sprite_data_enemy object directly controls what the boss looks like and where it starts. INIT_POSITION is where the boss spawns on screen when the level loads — I placed it at 72% across the canvas so it starts far from the player at 12%. health and moveSpeed are read by PeppaBossEnemy's constructor, so changing these numbers in the config is all it takes to make Daddy Pig harder than George Pig without touching any other code.
📚 Related Homework: Classes and Methods
Classes and Methods Homework - Demonstrates object-oriented programming fundamentals, including class design, method implementation, and inheritance — the foundation of the game's class hierarchy (PeppaBossEnemy, PeppaBattleLevelBase, etc.).
⚙️ Methods & Parameters (5+ with return values)
The five methods in this project that clearly use return values are moveTowardPlayer(), takeDamage(), toggleHitbox(), postScore(), and getLeaderboard(). These return values are used to control movement, battle state, debug state, and API response handling.
1. moveTowardPlayer(target) — controls boss movement every frame
/**
 * Moves boss toward a target object each frame using normalized direction vector.
 * @param {Object} target - game object with .position, .width, .height
 * @returns {boolean} true if movement occurred, false if already at target
 */
moveTowardPlayer(target) {
  const myCenterX = this.position.x + this.width  / 2;
  const myCenterY = this.position.y + this.height / 2;
  const dx = (target.position.x + target.width  / 2) - myCenterX;
  const dy = (target.position.y + target.height / 2) - myCenterY;
  const distance = Math.hypot(dx, dy);   // √(dx² + dy²)

  if (distance > 1) {
    this.position.x += (dx / distance) * this.moveSpeed;  // normalize + scale
    this.position.y += (dy / distance) * this.moveSpeed;
    return true;
  }
  return false;
}update() and is what makes the boss visibly chase the player across the screen. It calculates the straight-line direction from the boss to the player, then moves the boss exactly moveSpeed pixels in that direction. Because it normalizes the direction vector first, the boss always moves at the same speed — it doesn't slow down when far away or speed up when close. The returned boolean tells update() whether to bother calling stayWithinCanvas() — no point clamping position if the boss didn't move.
2. takeDamage(amount) — controls whether a laser hit actually hurts the boss
/**
 * Applies damage to boss. Respects invulnerability window and defeat state.
 * @param {number} amount - HP to subtract (default 1)
 * @returns {boolean} true if this hit caused defeat
 */
takeDamage(amount = 1) {
  if (this.isDefeated) {                          // nested condition 1
    console.log(`[Boss] Already defeated.`);
    return true;
  }
  if (!this.isVulnerable) {                       // nested condition 2
    console.log(`[Boss] Invulnerable, ignoring.`);
    return false;
  }
  this.health        = Math.max(0, this.health - amount);
  this.isVulnerable  = false;
  this.lastDamagedAt = Date.now();
  console.log(`[Boss] Hit! HP: ${this.health}/${this.maxHealth}`);

  if (this.health === 0) {                        // nested condition 3
    this.isDefeated = true;
    this.canvas.style.filter  = 'grayscale(1) brightness(0.8)';
    this.canvas.style.opacity = '0.6';
    console.log(`[Boss] Defeated!`);
  }
  return this.isDefeated;
}takeDamage on every frame it overlapped, killing Daddy Pig's 12 HP in under a second. The third condition is what actually ends the level — when isDefeated becomes true, the boss visually grays out and update() in the level sees that flag and triggers the win screen or level transition.
3. spawnLaser(fromX, fromY, targetX, targetY, isPlayerLaser) — creates a new projectile
/**
 * Spawns a laser aimed from one point toward a target point.
 * @param {number}  fromX         - origin X coordinate
 * @param {number}  fromY         - origin Y coordinate
 * @param {number}  targetX       - aim target X coordinate
 * @param {number}  targetY       - aim target Y coordinate
 * @param {boolean} isPlayerLaser - true = player fired it, false = enemy fired it
 */
spawnLaser(fromX, fromY, targetX, targetY, isPlayerLaser) {
  const dx  = targetX - fromX;
  const dy  = targetY - fromY;
  const len = Math.hypot(dx, dy) || 1;     // || prevents divide-by-zero

  this.lasers.push({                          // push object into Array
    x: fromX, y: fromY,
    vx: (dx / len) * this.laserSpeed,         // Number — velocity x
    vy: (dy / len) * this.laserSpeed,         // Number — velocity y
    isPlayerLaser,                              // Boolean — ownership flag
    life: 60, maxLife: 60                     // Number — lifespan in frames
  });
}this.lasers array. That array is then looped through every frame by updateLasers() — each laser moves across the screen because its vx and vy values get added to its position each frame. The isPlayerLaser boolean is critical: the collision check reads this flag to know whether to damage the boss (player laser) or the player (enemy laser). A laser without this flag would hit everything including its own shooter.
4. drawHitbox() — visually shows the boss collision boundary for debugging
/**
 * Draws a red rectangle over the boss sprite for collision debugging.
 * Only active when this.showHitbox === true.
 */
drawHitbox() {
  const ctx = this.gameEnv?.ctx;
  if (!ctx) return;
  ctx.save();
  ctx.strokeStyle = 'rgba(255, 0, 0, 0.85)';  // String — CSS color
  ctx.lineWidth   = 2;                          // Number
  ctx.strokeRect(this.position.x, this.position.y, this.width, this.height);
  ctx.fillStyle   = 'rgba(255,0,0,0.08)';
  ctx.fillRect  (this.position.x, this.position.y, this.width, this.height);
  ctx.restore();
  console.log(`[Hitbox] pos=(${Math.round(this.position.x)},${Math.round(this.position.y)}) size=${this.width}x${this.height}`);
}widthPercentage: 0.45 and heightPercentage: 0.6 in the sprite config until the red rectangle matched the visible body, making combat feel accurate to what the player sees.
5. toggleHitbox() — turns hitbox display on or off during a live game session
/**
 * Toggles hitbox debug display on/off.
 * @returns {boolean} the new state of showHitbox
 */
toggleHitbox() {
  this.showHitbox = !this.showHitbox;                         // Boolean NOT operator
  console.log(`[Hitbox] now ${this.showHitbox ? 'ON' : 'OFF'}`);  // String template literal
  return this.showHitbox;
}! operator flips showHitbox between true and false each time this is called. Inside update(), that boolean is checked every frame — when it's true, drawHitbox() fires and the red overlay appears on screen. When it's false, nothing extra is drawn. This lets me toggle the debug view in a live running game without restarting, which was essential for tuning hitbox sizes during playtesting.
📚 Related Homework: Classes and Methods
Classes and Methods Homework - Demonstrates object-oriented programming fundamentals, including class design, method implementation, and inheritance — the foundation of the game's class hierarchy (PeppaBossEnemy, PeppaBattleLevelBase, etc.).
🗂️ Data Types
Every piece of game state is stored as one of five data types. The type isn't just a label — it determines what operations are valid and how the game logic behaves with that value. Using the wrong type would break the comparisons and calculations that make the game work.
| Type | How It Controls the Game | Code Example |
|---|---|---|
| Number | health tracks how many more hits the boss can take before the level ends. moveSpeed is how many pixels the boss moves toward the player each frame — 1.4 for Daddy Pig vs 1.0 for George Pig is what makes him feel faster and harder. Date.now() timestamps control every cooldown timer in the game. |
this.health = 5 · this.moveSpeed = 1.4 · Date.now() · life: 60 |
| String | enemyImage is the file path the engine uses to load the boss sprite — get this string wrong and the boss appears as a broken image. 'grayscale(1)' applied to canvas.style.filter is what visually grays the boss out when defeated. Template literals build the HUD messages shown on screen. |
enemyName: 'Daddy Pig' · 'grayscale(1)' · template literals |
| Boolean | Every major game state is a boolean flag. isDefeated stops the boss from moving and accepting damage, and triggers the win condition check. battleEnded stops the entire update() loop from running so nothing changes after the fight is over. isPlayerLaser decides whether a projectile damages the boss or the player. |
isDefeated · isVulnerable · battleEnded · showHitbox · isPlayerLaser |
| Array | this.lasers holds every active projectile currently flying across the screen. Each frame the entire array is looped through — every laser moves, ages, and gets removed when it expires or hits something. Without this array there would be no way to track multiple simultaneous projectiles. gameLevelClasses is the ordered list the engine uses to know which level to load next. |
this.lasers = [] · this.classes = [...] · gameLevelClasses |
| Object (JSON) | Each laser in this.lasers is an object storing its position, velocity, owner flag, and lifespan — all the data needed to update and render it each frame. The level config object passed to super() is what makes each level different from the others without needing separate logic code. |
{ enemyHealth: 12, enemySpeed: 1.4 } · INIT_POSITION: { x, y } |
📚 Related Homework: Arrays
Arrays Homework - Shows understanding of array manipulation, indexing, and iteration, which is used throughout the game for managing collections of objects like laser arrays, level configurations, and leaderboard data.
📚 Related Homework: Booleans
Booleans Homework - Demonstrates boolean logic and state management, critical for game flags like isDefeated, isVulnerable, and battleEnded that control game flow and behavior.
📚 Related Homework: Data Abstraction
Data Abstraction Homework - Shows ability to design abstract data types and encapsulate data, similar to how the game uses config objects and class properties to manage complex state.
📚 Related Homework: Strings
Strings Homework - Demonstrates string manipulation and processing, which appears in the game through player names, console logging, and string template literals for dynamic messages.
🔢 Operators
Operators are the actual computations that run every frame to produce the game's behavior. The boss physically moves because of += (dx/distance) * moveSpeed. The laser system works because of vector math. The fight logic branches because of boolean comparisons.
| Operator Type | Operators | How It Controls the Game |
|---|---|---|
| Mathematical | + - * / Math.hypot() Math.max() |
position.x += vx moves every laser across the screen each frame. Math.hypot(dx,dy) calculates the straight-line distance from boss to player so the chase direction can be normalized. Math.max(0, health - amount) prevents health from going below zero and causing weird behavior. |
| Boolean / Logical | && || ! === <= >= > |
The AABB collision check uses four && conditions — all must be true for a hit. ! inverts boolean flags like !boss.isDefeated to gate actions that should only happen while the boss is alive. >= compares timestamps to enforce attack and damage cooldowns. |
| String Operations | Template literals `${}`, string concatenation |
Template literals build the image path `${path}/images/gamify/${config.enemyImage}` — this is what tells the engine which sprite file to load for each boss. They also build every HUD message and console log that shows game state. |
| Nullish / Optional | ?? ?. |
data?.health ?? 3 safely handles a level that forgets to set enemy health — the ?. prevents a crash if data is null, and ?? falls back to 3 so the boss still has HP. Without these, a missing config property would throw an error and break the level. |
| Assignment | = += |
this.position.x += vx is what makes the boss and lasers physically move — the position is updated by adding the velocity each frame, creating smooth animation. |
Boolean Expression Example — AABB Collision Detection
// All FOUR conditions must be true simultaneously with && for a collision hit
if (hitLeft              <  boss.position.x + boss.width  &&   // left edge check
    hitLeft + hitW        >  boss.position.x               &&   // right edge check
    hitTop               <  boss.position.y + boss.height  &&   // top edge check
    hitTop  + hitH        >  boss.position.y) {                  // bottom edge check
  boss.takeDamage(1);
  this.lasers.splice(i, 1);
}hitLeft < boss.x + boss.width), hasn't gone past the right edge, is below the top, and above the bottom — all four true simultaneously means the rectangles intersect and the laser hit. If any one condition is false — for example the laser flew past the boss entirely — the && chain short-circuits and no damage is dealt. This is what makes hit detection in the game feel spatially accurate rather than registering hits at arbitrary distances.
📚 Related Homework: Mathematical Expressions
Mathematical Expressions Homework - Shows understanding of mathematical operations and expressions, used in the game for position calculations, collision detection, and score computations.
🔁 Control Structures
Iteration — for loop over laser array
// Iterate backwards through the lasers array — safe to splice while looping
for (let i = this.lasers.length - 1; i >= 0; i--) {
  const L = this.lasers[i];

  L.x    += L.vx;        // move laser each frame
  L.y    += L.vy;
  L.life -= 1;           // count down lifespan

  if (L.life <= 0) {
    this.lasers.splice(i, 1);   // remove expired laser
    continue;
  }
  // ... collision checks below ...
}splice(i, 1). If you loop forward and remove index 3, what was at index 4 slides down to index 3 and gets skipped that frame — meaning a laser could pass through the boss without registering a hit. Looping backwards means only already-visited indices shift, so nothing is skipped.
Conditionals — state transitions in the game loop
update() {
  // Conditional 1: guard clause stops execution if battle is over
  if (this.battleEnded) return;

  // Conditional 2: check win condition
  if (boss.isDefeated && !this.battleEnded) {
    this.battleEnded = true;
    const isFinalLevel = ctrl.currentLevelIndex === ctrl.levelClasses?.length - 1;
    if (isFinalLevel) {
      this.showWinScreen();
    } else {
      this.messageTimeout = setTimeout(() => {
        if (ctrl?.currentLevel) ctrl.currentLevel.continue = false;
      }, 1100);
    }
    return;
  }

  // Conditional 3: lose condition
  if (this.playerHealth <= 0 && !this.battleEnded) {
    this.battleEnded = true;
    this.showLoseScreenAndRestart();
  }
}
Nested Conditions — attack cooldown with compound checks
// Outer condition: player pressed SPACE
if (this.attackRequested) {
  this.attackRequested = false;

  // Inner condition: cooldown elapsed AND boss is still alive
  if (now - this.lastAttackAt >= this.attackCooldownMs && !boss.isDefeated) {
    this.lastAttackAt = now;
    this.spawnLaserStraight(px, py, player.direction, true);
  }
}attackRequested gets set to true by the keydown listener). The inner condition then checks two things with &&: enough time has passed since the last shot (the cooldown) AND the boss isn't already dead. If both pass, a laser is spawned and lastAttackAt is updated to restart the cooldown. The result is the player fires one laser at a time with a short delay between shots — which is what gives the combat its rhythm and makes it a challenge rather than a one-button win.
📚 Related Homework: Nested Conditionals
Nested Conditionals Homework - Relates to "Control Structures — Iteration, Conditions, Nested Conditions". This homework demonstrates my understanding of complex decision-making logic using nested if-else statements, which is crucial for game mechanics like boss behavior and win/lose conditions in the Peppa Pig game.
📚 Related Homework: Iterations
Iterations Homework - Relates to "Control Structures — Iteration, Conditions, Nested Conditions". Shows proficiency in loops and iteration, essential for game loops, collision detection, and processing arrays of game objects like lasers and enemies.
⌨️ Input / Output
Keyboard Input — Event Listeners
Keyboard events are captured with addEventListener on the document. The SPACE key triggers laser attacks; WASD is handled by the engine's Player class.
// Keyboard event listener registered in initialize()
this.boundKeyDown = this.handleKeyDown.bind(this);
document.addEventListener('keydown', this.boundKeyDown);

handleKeyDown(event) {
  if (event.code === 'Space') {
    this.attackRequested = true;   // Boolean flag set on keypress
    event.preventDefault();         // stop page from scrolling
  }
}

// Listener is cleaned up in destroy() to prevent memory leaks
document.removeEventListener('keydown', this.boundKeyDown);
Code Runner Challenge
Simulate a key event system and nested condition logic like your play attack cooldown.
Canvas Rendering — draw() via GameEngine
All characters are drawn to the HTML5 Canvas each frame. The draw() method is inherited from GameObject and called inside the overridden update(). The hitbox overlay uses the Canvas 2D context directly.
// draw() is inherited — called every frame inside update()
update() {
  this.draw();   // Canvas API — renders sprite to canvas element
  // ...
}

// Direct Canvas API usage in drawHitbox()
const ctx = this.gameEnv?.ctx;
ctx.strokeRect(this.position.x, this.position.y, this.width, this.height);
GameEnv Configuration
The game environment is initialized in the main entry file. Canvas size, level classes, and server URIs are all passed in via the environment object.
// 03-v1-1-PeppaPig.md — game entry point
const environment = {
  path:           "{{site.baseurl}}",
  pythonURI:      pythonURI,               // String — backend server
  javaURI:        javaURI,                 // String — backend server
  fetchOptions:   fetchOptions,            // Object — shared fetch config
  gameContainer:  document.getElementById("gameContainer"),
  gameCanvas:     document.getElementById("gameCanvas"),
  gameLevelClasses: [PeppaLevel1, PeppaLevel2, PeppaLevel3]   // Array
};

Game.main(environment);   // launches the game loop
🌐 API Integration — iTunes Music API & Async I/O
An API (Application Programming Interface) is a way for your code to talk to an external service over the internet. You send a request, the service sends back data — usually as JSON. In the game, this same pattern is used to save scores and fetch leaderboard data. To show how APIs work in a fun way, I used the public iTunes Search API to search for songs and play previews directly in the browser.
How the iTunes API Works
The iTunes Search API is free and requires no API key. You send a GET request with a search term, and it returns a JSON object with an array of matching tracks — each one includes the song name, artist, album art, and a 30-second previewUrl you can feed directly to an Audio object.
// Step 1 — build the request URL with a search term
const url = 'https://itunes.apple.com/search?term=every+breath+you+take+police&entity=song&limit=1';

// Step 2 — fetch() sends the HTTP GET request (async — we must await it)
const response = await fetch(url);

// Step 3 — parse the JSON body (also async)
const data = await response.json();

// Step 4 — pull the first result out of the results array
const track = data.results[0];

// Step 5 — use the previewUrl to play the song
const audio = new Audio(track.previewUrl);
audio.play();

console.log(`Now playing: ${track.trackName} by ${track.artistName}`);
Full fetchAndPlay() — async/await + error handling
/**
 * Searches the iTunes API for a song and plays the preview.
 * @param {string} searchTerm - e.g. "every breath you take police"
 * @returns {Promise<void>}
 */
async fetchAndPlay(searchTerm) {
  try {
    const url = `https://itunes.apple.com/search?term=${encodeURIComponent(searchTerm)}&entity=song&limit=1`;
    const response = await fetch(url);          // async HTTP GET

    if (!response.ok) {
      throw new Error(`HTTP error: ${response.status}`);
    }

    const data = await response.json();          // parse JSON response
    const { trackName, artistName, previewUrl } = data.results[0];  // destructuring

    if (!previewUrl) throw new Error('No preview available');

    new Audio(previewUrl).play();
    console.log(`Playing: ${trackName} — ${artistName}`);

  } catch (error) {                              // API error handling
    console.error(`[iTunes] Fetch failed: ${error.message}`);
  }
}

fetchAndPlay('every breath you take police');{ trackName, artistName, previewUrl }) pulls exactly the fields we need from the response object.
Connection to the Game
The game's PeppaMusic class uses this exact same pattern — it calls the iTunes API to fetch background music previews and plays them during gameplay. The same fetch() → await response.json() → extract field → play flow powers both the leaderboard and the in-game music.
🎵 Live Demo — Play "Every Breath You Take"
Click the button to make a real iTunes API call and play the 30-second preview in your browser.
📚 Related Homework: JSON
JSON Homework - Demonstrates JSON parsing and serialization, directly applicable to API integration where data is sent and received as JSON objects.
📝 JSDoc Comments & Code Documentation
Every custom class and method has JSDoc documentation with @param and @returns tags. Inline comments explain non-obvious logic throughout. Comment density exceeds the 10% requirement.
/**
 * PeppaBossEnemy — custom boss class extending the Enemy base.
 * Adds health system, defeat state, invulnerability window,
 * movement AI, and hitbox debug visualization.
 *
 * @class PeppaBossEnemy
 * @extends Enemy
 * @example
 * // Instantiated automatically by the engine via this.classes array
 * const boss = new PeppaBossEnemy(sprite_data_enemy, gameEnv);
 */
class PeppaBossEnemy extends Enemy {

  /**
   * @param {Object} data              - Sprite and config data
   * @param {number} data.health       - Starting HP for this boss
   * @param {number} data.moveSpeed    - Pixels per frame toward player
   * @param {Object} gameEnv           - Shared game environment reference
   */
  constructor(data = null, gameEnv = null) {
    super(data, gameEnv);
    /** @type {number} Current health points */
    this.health = data?.health ?? 3;
    /** @type {boolean} Whether boss is currently in defeat state */
    this.isDefeated = false;
  }
}
🐛 Debugging
| DevTools Tab | What I Used It For |
|---|---|
| Console | Every HP change, defeat event, laser spawn, and vulnerability reset logs to the console. I can track the full game state in real time across all 60fps frames without pausing execution. |
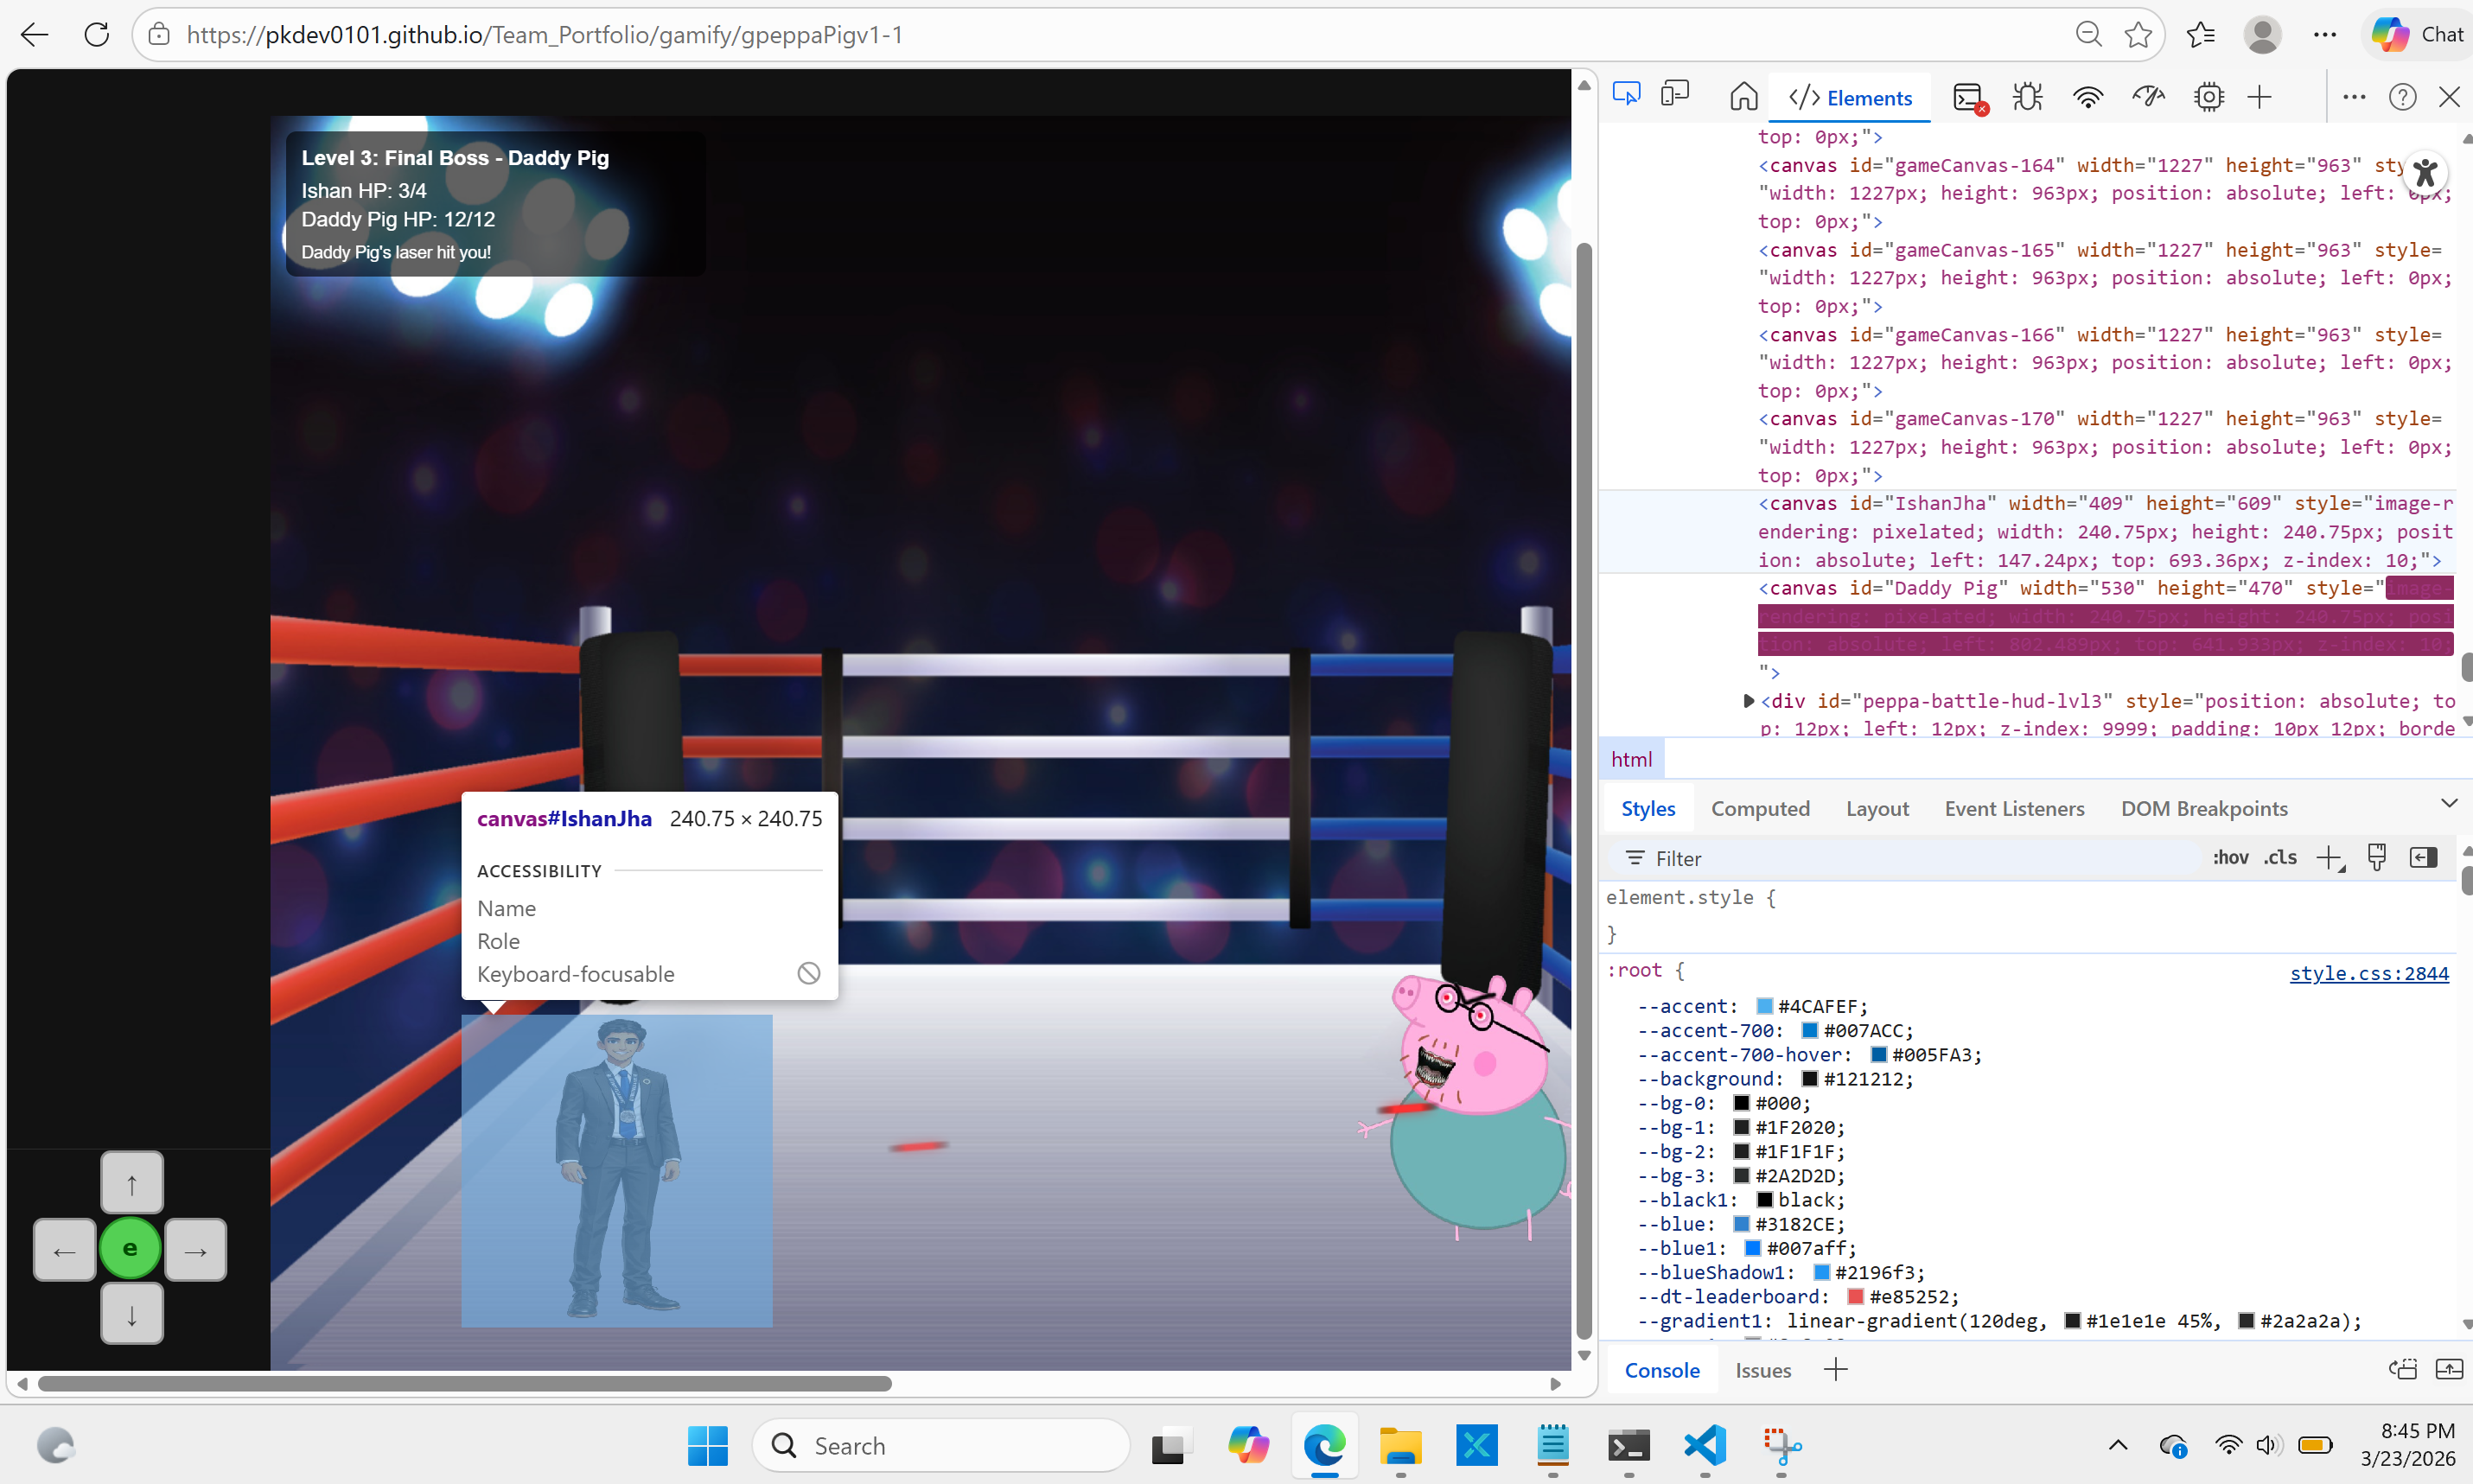
| Hitbox Visualization | drawHitbox() draws a red rectangle + fill over the boss sprite showing the exact collision boundary. I used this to fix misaligned hit detection where the sprite image didn't match the logical hitbox rectangle. |
| Sources (Breakpoints) | Set a breakpoint inside takeDamage() to pause execution mid-frame, step through the invulnerability check line by line, and inspect this.health, this.isVulnerable, and this.lastDamagedAt in the Scope panel. |
| Network | Inspected the leaderboard fetch() calls — verified the POST request body was correctly JSON-serialized, checked HTTP status codes (200 vs 401 vs 500), identified CORS errors, and read the raw response JSON. |
| Application | Checked cookies and localStorage to verify the user's login session was persisting correctly between page reloads, and confirmed the auth token was being sent with API requests. |
| Elements | Used the Element Viewer to inspect the game's canvas element, HUD div, and laser overlay canvas. Verified CSS positioning of the HUD and confirmed the laser layer canvas was appended to the correct container. |
Console Logging Pattern
// Strategic console.log placement — tracks state in update() and collision methods
console.log(`[PeppaBossEnemy] Spawned: ${data?.id} with ${this.health} HP`);
console.log(`[Boss] Hit! HP: ${this.health}/${this.maxHealth}`);
console.log(`[Boss] Defeated!`);
console.log(`[Boss] Invulnerable, ignoring damage.`);
console.log(`[Hitbox] pos=(${Math.round(this.position.x)},${Math.round(this.position.y)})`);
console.log(`[Leaderboard] Score saved:`, data);
console.error(`[Leaderboard] POST failed:`, error.message);
✅ Testing & Verification
Gameplay Testing
Each level was play-tested end-to-end to verify: laser collision correctly reduces boss HP, player HP correctly depletes on contact and enemy laser hits, the lose screen appears and the level restarts when player HP hits 0, and the win condition advances to the next level (or shows the final win screen on Level 3).
Integration Testing — Leaderboard API
// Integration test — verified in browser with Network tab open
// 1. Win Level 3 → postScore() fires → Network tab shows POST /api/leaderboard
// 2. Response status: 200 OK
// 3. Response body: { id: 42, player: "IshanJha", score: 300, date: "2026-03-23" }
// 4. getLeaderboard() → GET /api/leaderboard → array of score objects returned
// 5. JSON.parse verified — object destructuring logs each entry correctly
API Error Handling — try/catch
// Tested by temporarily pointing pythonURI to a bad endpoint
try {
  const response = await fetch(badUrl, fetchOptions);
  if (!response.ok) throw new Error(`HTTP ${response.status}`);
  const data = await response.json();
  return data;
} catch (error) {
  // Game continues running — leaderboard failure is non-fatal
  console.error(`[API] Request failed: ${error.message}`);
  return null;
}Code Runner Challenge
Practice async/await and JSON parsing using the iTunes Search API. Edit the search term and run it to see the track data returned.
🕹️ Other Game Examples & Rubric Connections
In addition to Peppa Pig Fight Club, I built other games that reinforce the same college-ready concepts in different ways. These projects help show that the rubric skills in this blog were not used only once — I also applied OOP, methods, arrays, conditionals, input/output, and game-state logic in Tic-Tac-Toe, Connect 4, and Whack-a-Mole.
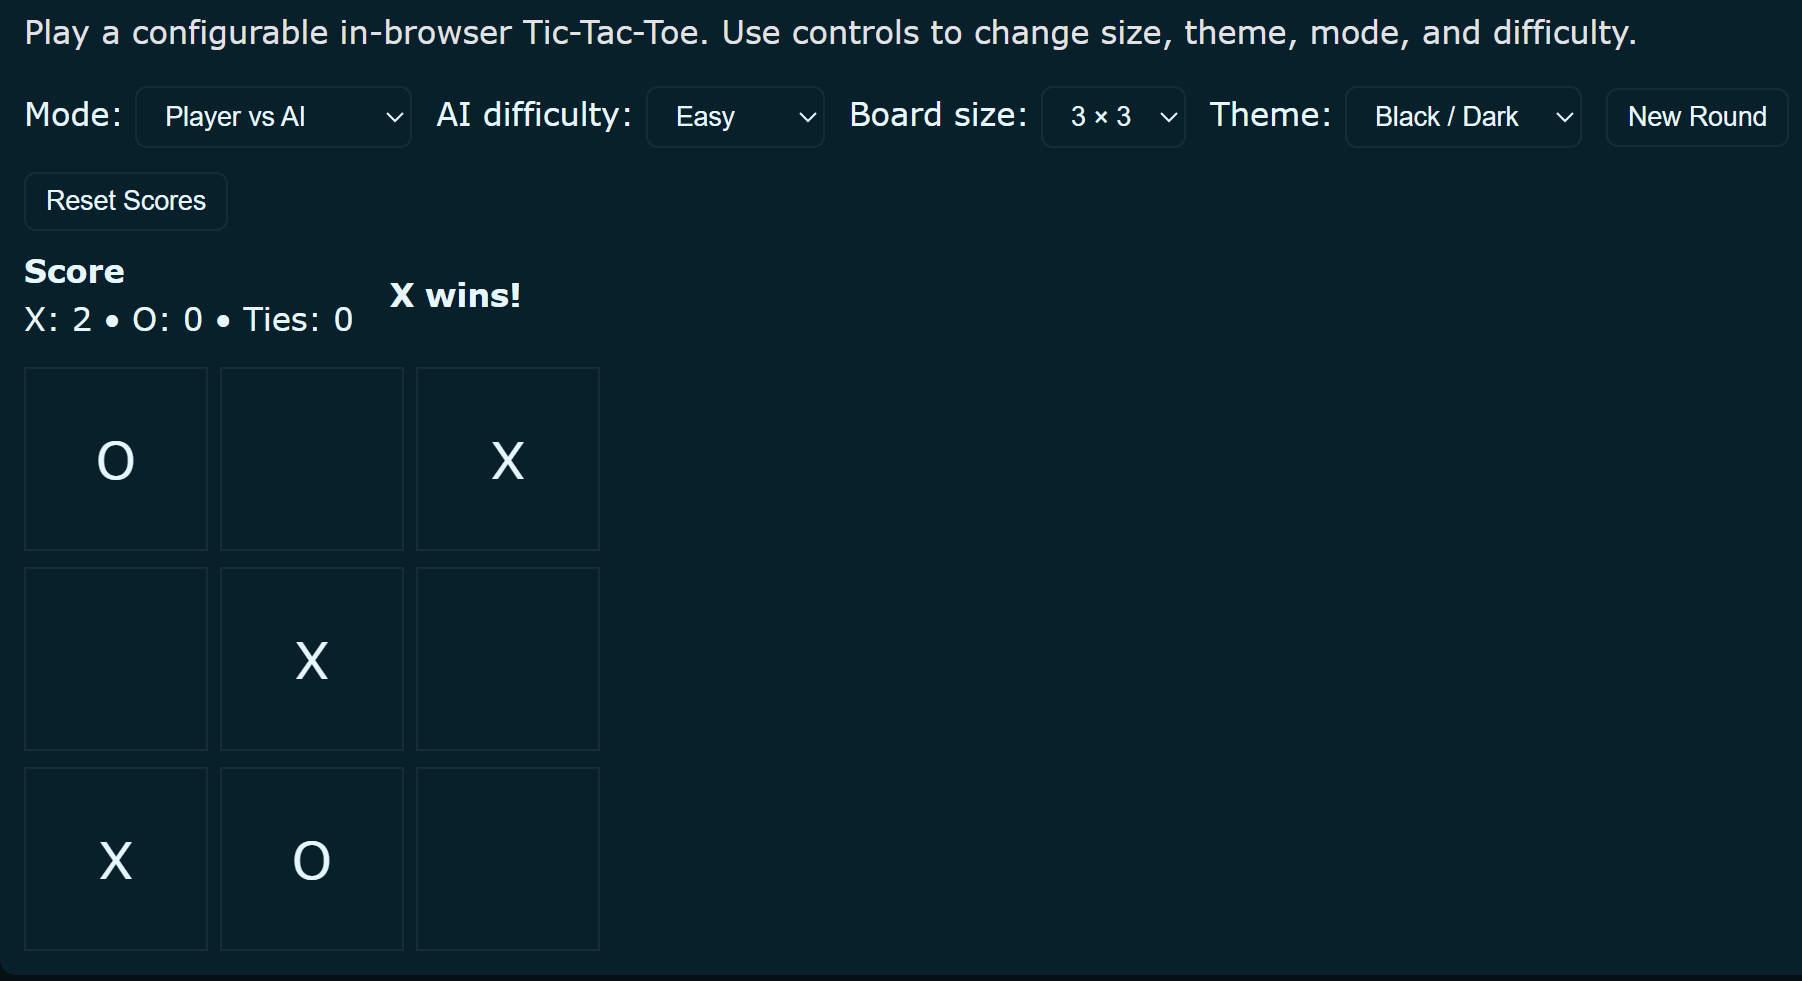
Tic-Tac-Toe — OOP Structure and Game Orchestration
My Tic-Tac-Toe lesson is a clean example of object-oriented design. It separates responsibility into a Player class, a Board class, and a TicTacToe controller class. That structure directly supports the rubric requirement for custom classes and methods because each class has a distinct job: player identity, board state, and overall game flow.
class Player:
    def __init__(self, name, symbol):
        self.name = name
        self.symbol = symbol

class Board:
    def __init__(self):
        self.grid = [" "] * 9

    def make_move(self, position, symbol):
        index = position - 1
        if index < 0 or index > 8:
            return False
        if self.grid[index] != " ":
            return False
        self.grid[index] = symbol
        return True

    def check_winner(self, symbol):
        win_combinations = [
            [0,1,2], [3,4,5], [6,7,8],
            [0,3,6], [1,4,7], [2,5,8],
            [0,4,8], [2,4,6]
        ]
        for combo in win_combinations:
            if (self.grid[combo[0]] == symbol and
                self.grid[combo[1]] == symbol and
                self.grid[combo[2]] == symbol):
                return True
        return False

class TicTacToe:
    def __init__(self, player1, player2):
        self.board = Board()
        self.players = [player1, player2]
self.current_player = player1make_move() and check_winner() methods are especially useful as examples of return values, conditionals, and iteration through game-state data.
Connect 4 — Multiple Classes, UI Management, and DOM-Based Input/Output
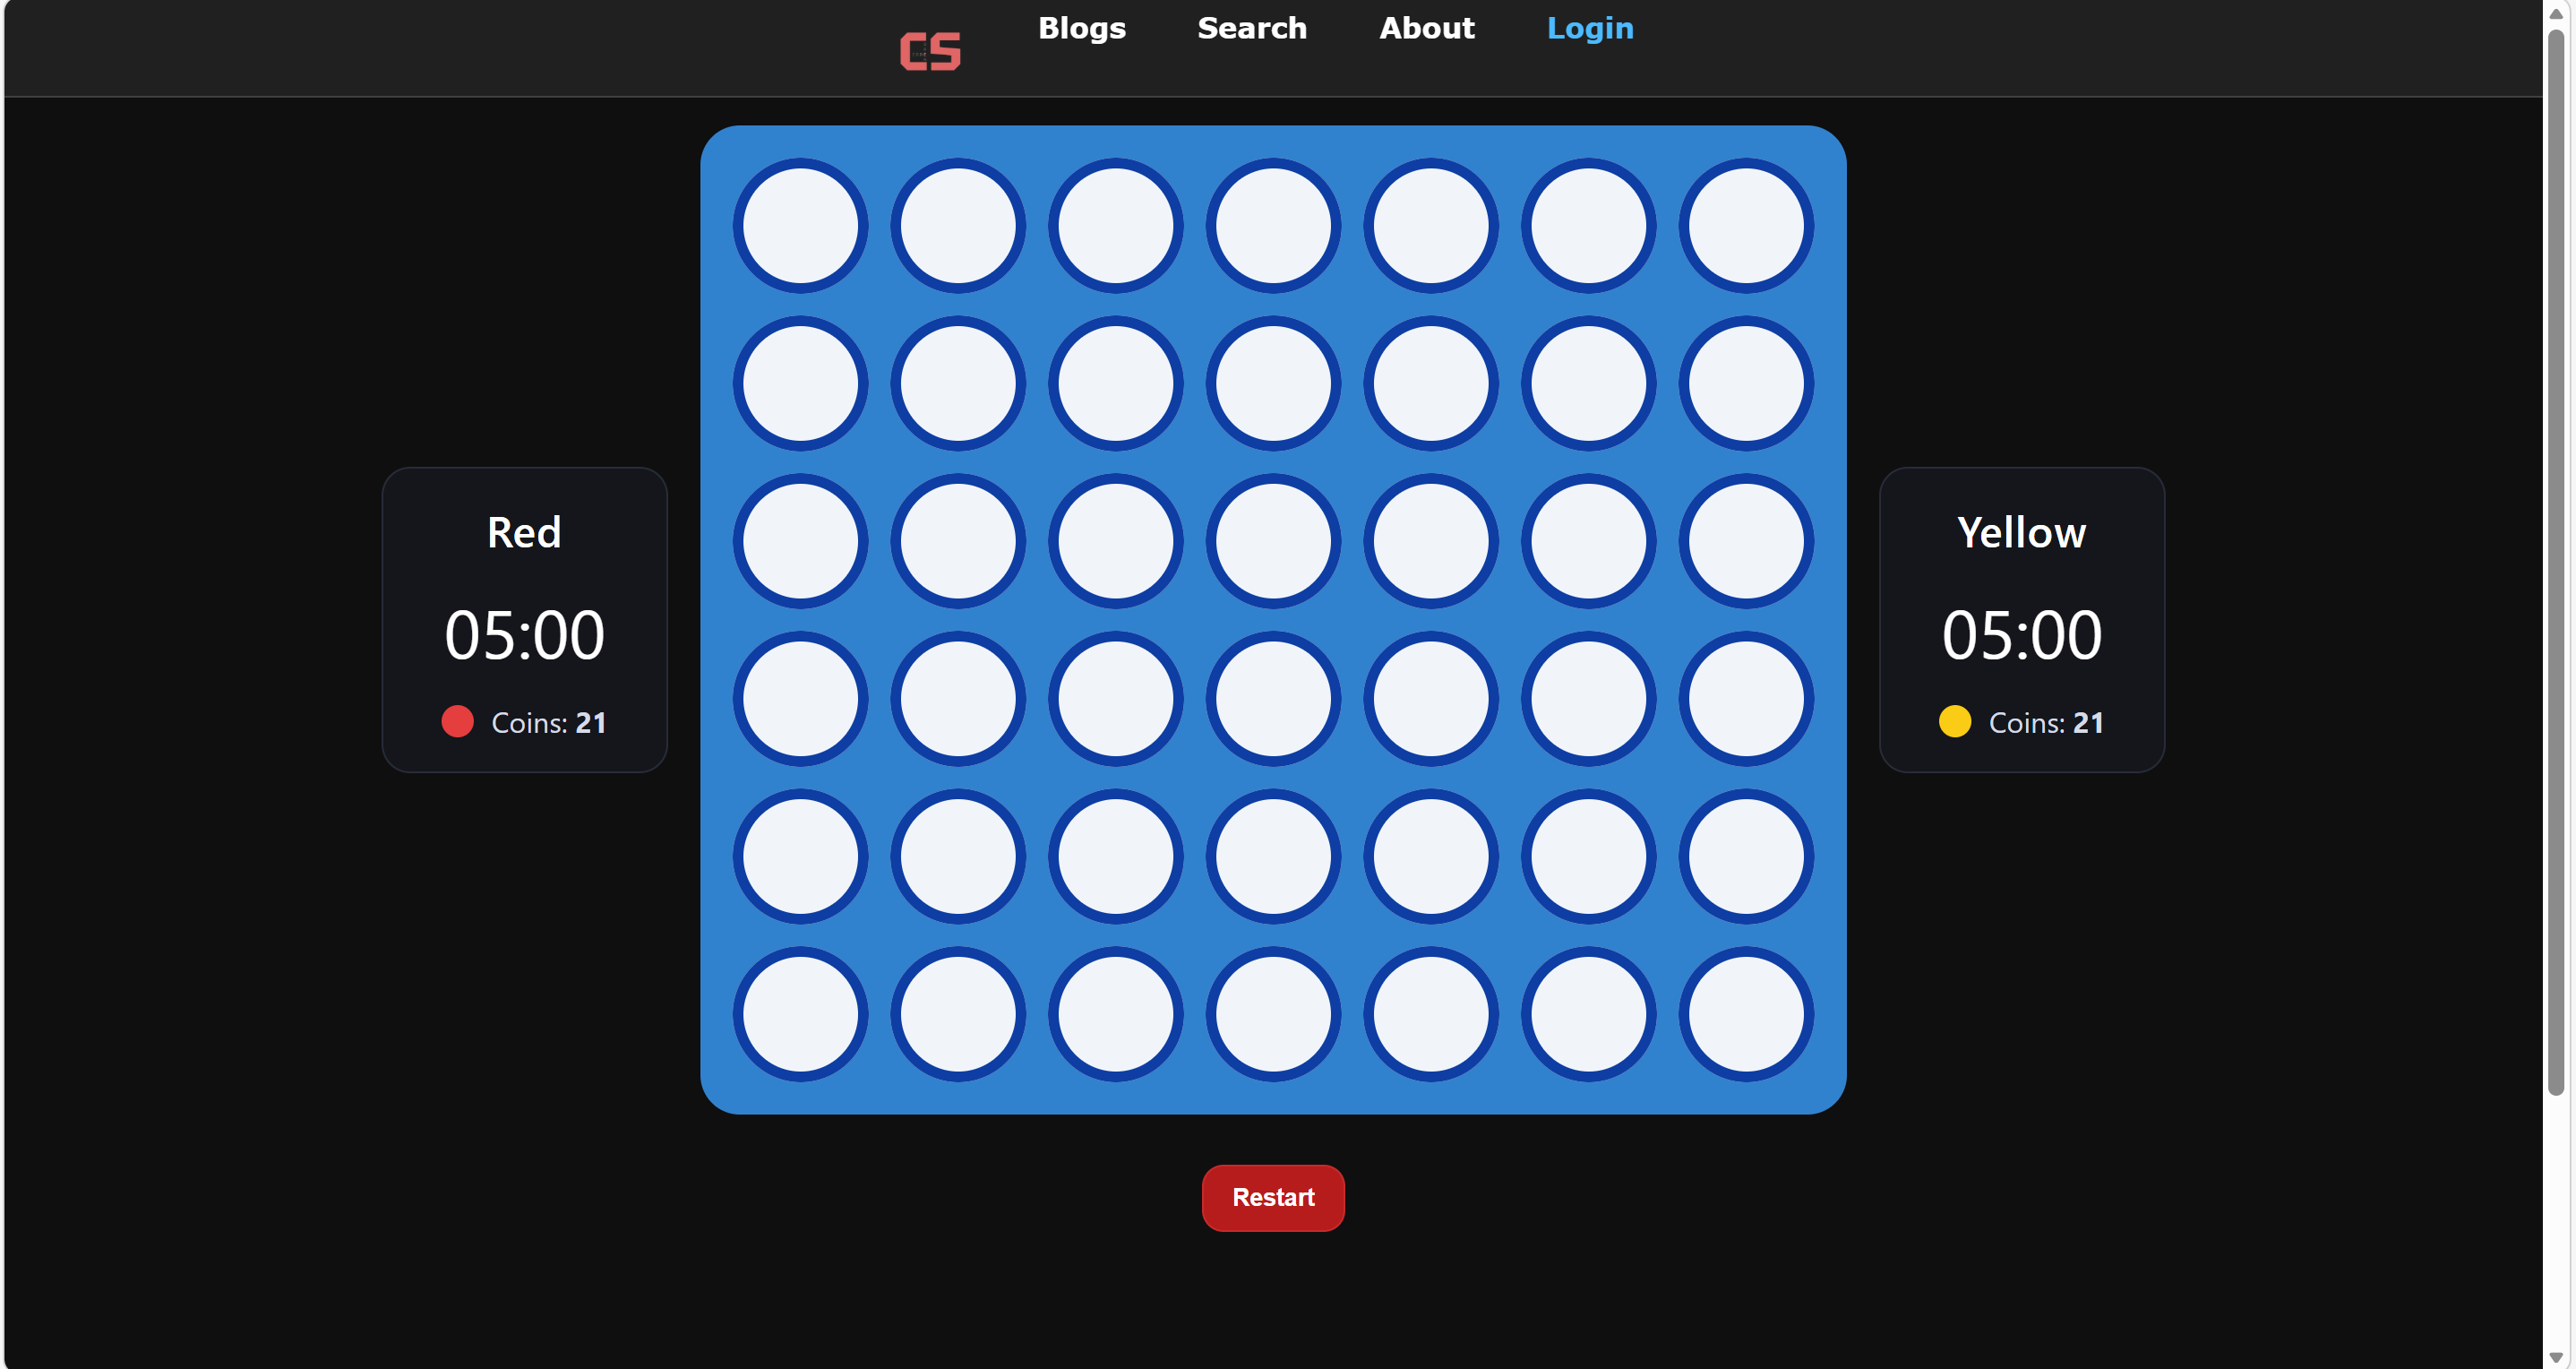
My Connect 4 project is another strong OOP example because it uses multiple JavaScript classes working together: Player, GameBoard, GameTimer, GameUI, and Connect4Game. This shows deeper class-based design and supports the rubric categories for arrays, methods, user input, UI output, timers, and conditional game-state logic.
class Player {
  constructor(name, color, isRobot = false) {
    this.name = name;
    this.color = color;
    this.time = 300;
    this.coins = 21;
    this.isRobot = !!isRobot;
  }

  usesCoin() {
    if (this.coins > 0) {
      this.coins--;
      return true;
    }
    return false;
  }
}

class GameBoard {
  constructor(rows = 6, cols = 7) {
    this.rows = rows;
    this.cols = cols;
    this.grid = [];
    this.initialize();
  }

  initialize() {
    this.grid = Array.from({length: this.rows}, () => Array(this.cols).fill(null));
  }

  isValidColumn(col) {
    return col >= 0 && col < this.cols && this.grid[0][col] === null;
  }

  checkWin(row, col) {
    const color = this.grid[row][col];
    if (!color) return false;
    // checks vertical, horizontal, and diagonal directions
    return true;
  }
}

class Connect4Game {
  constructor() {
    this.board = new GameBoard(6, 7);
    this.redPlayer = new Player('Red', 'red');
    this.yellowPlayer = new Player('Yellow', 'yellow');
  }
}Whack-a-Mole — Inheritance, Canvas Rendering, Audio, and Stored Game Data
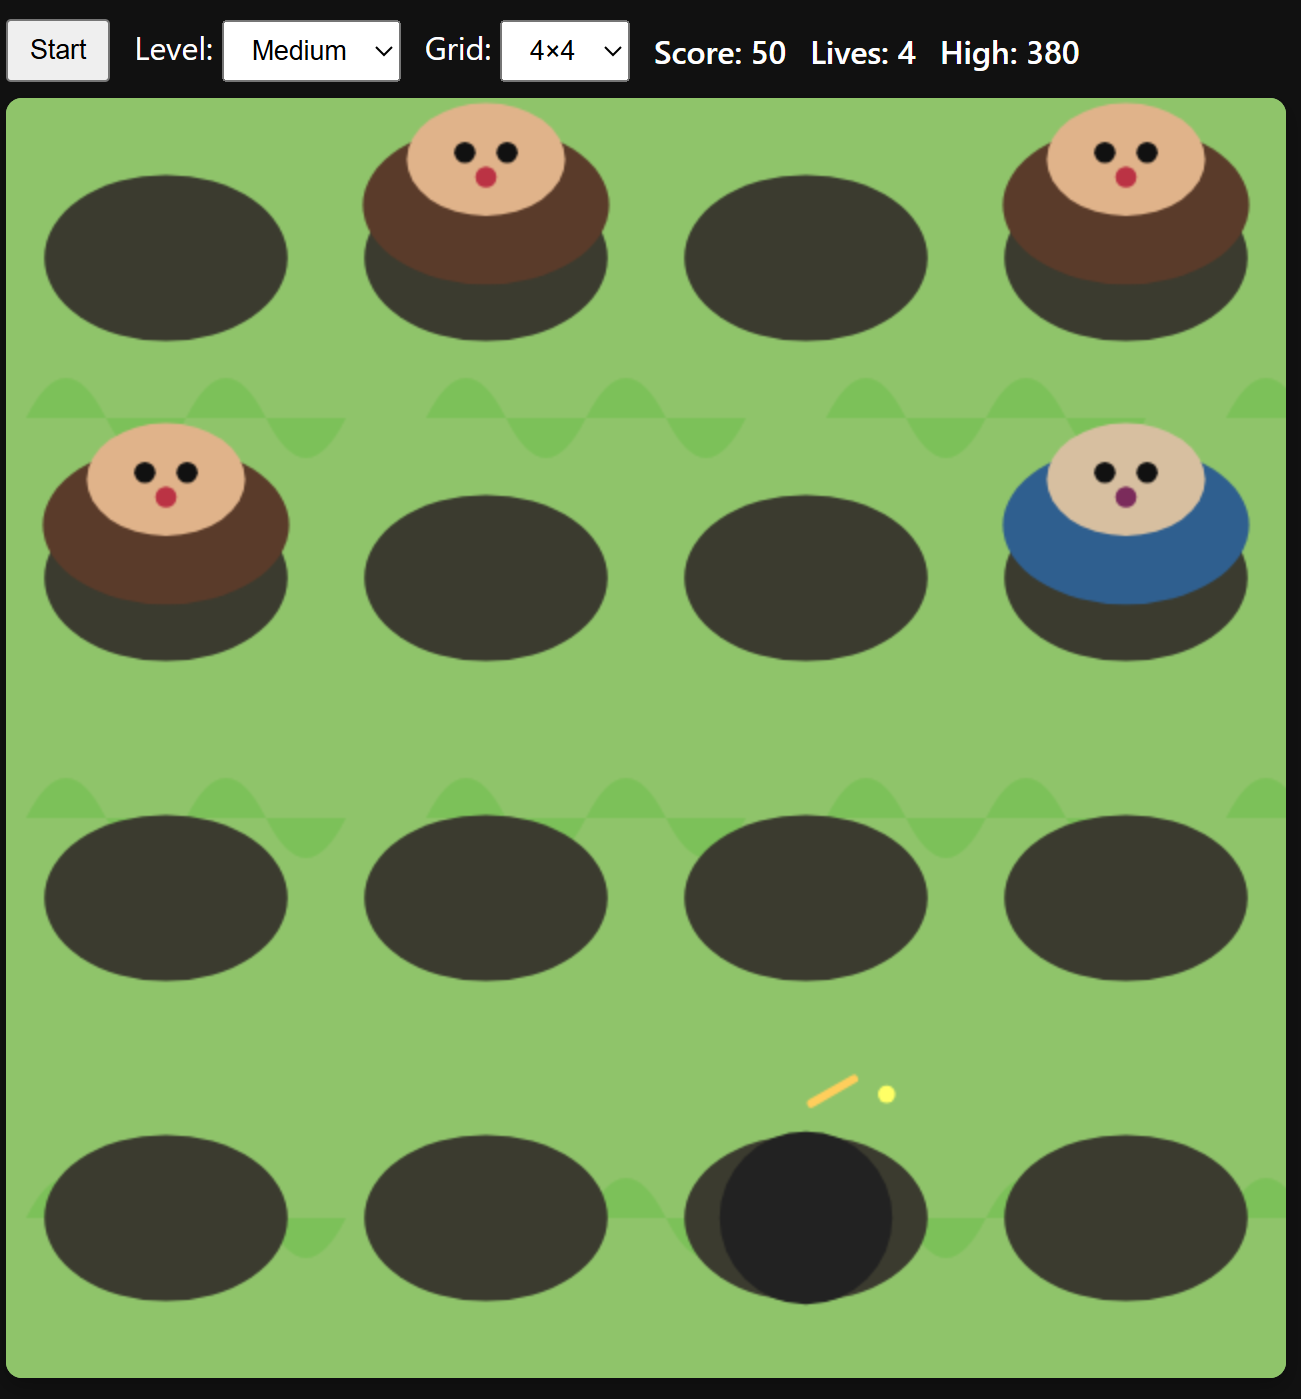
My Whack-a-Mole game is especially useful for the rubric because it demonstrates inheritance in a different way than Peppa Pig Fight Club. The base Entity class is extended by Mole and Bomb, while the Game class manages canvas rendering, input handling, scorekeeping, difficulty settings, and browser storage for high scores.
class Entity {
  constructor(hole, lifetime = 1400) {
    this.hole = hole;
    this.life = lifetime;
    this.spawnTime = Date.now();
    this.active = true;
  }

  update(dt, game) {
    if (!this.active) return;
    if (Date.now() - this.spawnTime > this.life) this.expire(game);
  }

  onHit(game) {
    this.expire(game);
  }
}

class Mole extends Entity {
  constructor(hole, type = 'brown') {
    super(hole, 1200);
    this.type = type;
    this.points = (type === 'blue' ? 50 : 10);
  }

  onHit(game) {
    game.addScore(this.points);
    if (this.type === 'blue') game.speedUp();
    super.onHit(game);
  }
}

class Bomb extends Entity {
  constructor(hole) {
    super(hole, 1200);
  }

  onHit(game) {
    super.onHit(game);
    game.lives -= 2;
    if (game.lives <= 0) game.end();
  }
}super(), canvas output, animation/game loops, browser input, and persistent data using localStorage. It also shows that I used object-oriented programming in multiple independent projects, not only in this final game.
📚 Homework Assignments
All homework assignments have been integrated into their relevant sections above, where they directly demonstrate the concepts discussed. Each homework link appears in the section it best exemplifies, with explanations of how it relates to the main topics.
For a complete list of all assignments, see the individual section homework links throughout this blog.